Showing posts with label How to?. Show all posts

How to Take Screenshots on an Android Device

Want to take a screen with your android tablet or mobile phone?If the answer is positive, the first thing you need to do is to check whether your android device supporting screenshots becausetaking a screenshot on Android deviceis not as straightforward as it seems. The operation system Android 4.0 or later offers us a built-in way to take a good screenshot, however, if your device using an older version of the Android, it’s little consolation to capture a screenshots.
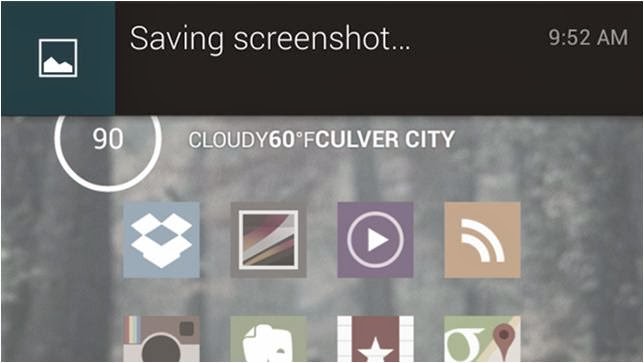
How to Take Screenshots on an Android Device
On the whole, there are two types of all the android devices; one is the device support a built-in way to take a good screenshot, the other is not. Aimed at the two types of mobile phones,below editor will show android user an easy-to-use guide helping android user to take the screenshot on an Android Device respectively!

For the Devices that support screenshots: Android 4.0 or above

Well, most of the android devices that equipped with the operation system Android 4.0 or latercan take the screenshots directly. So if you want to capture a picture of the phone’s screen, just hit the Volume Down button and keep it down for a while, at the same time press the Power button, then you will get a prompt message allowing you to take a screenshot. Why we can capture a screenshot in this way? It is because most of the Mobile phone makers had upgrade the phone operationsystem and screenshots are built right into your phone!

For the Device that don’t support screenshots: Android 2.3 or below

Well, for the devices that do not support screenshots, it is a little trouble to get a screenshots. Generally we go and get an app for help. There exists many free app on the Internet can help you to take a screenshot; unfortunately they all can’t work on anunrooted android device.

If you don't want to root your android device because of the complexhigh-risk operation,$3 will save you much energy. An app named No Root Screenshot It (£2.99) is a well-received program easily enables you to capture a screenshot, with it what you should do is download and install it on your android device.

Note: the app needs connect the android device to you PC via an USB cable because when you installed it on your device and connect it to you PC, it will instruct you to get a free desktop application to help you finishing the screenshots job. Once the two matched apps were installed successfully inturn, the app will enable screenshots on the device.

Author the Author:
Jerry Brown is a good writer of drm-assistant.com. He writes for it for two years and step into the software industry for three years. The app DVD ripping program his site shares with the DVD movie lovers had earns much praise. Plus it can take DVD region code off as well!
Posted by Ravi Kolhe | 1/23/2014 | Continue Reading...

How to Boost Facebook Marketing?

Facebook is a powerful marketing tool. With over one billion users, you can only imagine the reach this social networking site has.

But, it is not enough that you have an account here. You also need to know what works and what doesn’t for you. Here are few ways how you can boost your Facebook marketing.

Boost Facebook Marketing
Employ knowledgeable social media managers.

Inviting managers to your Facebook page is easy.

You can do it by indicating the manager’s personal Facebook page or sending them, an invite. Either way, it is best that they know what they are aware of their specific roles so they know which area to focus on. Make it clear who’s doing which.

Think carefully as well about the number of managers you are employing. You will not need ten people when two can manage the workload well.

Employing knowledgeable community managers allows you for more productive brainstorming sessions. These people know what they do and are talking about so you can be sure your page is in good hands.

Target posts.

Who do you want to share that information with?

One reason why Facebook users hide posts on their timeline is irrelevance. They do not need the product or the services so they do not want their friends think they are associated with it.

Make your posts work for you and share it only with those people you believe do care. You can always filter your audience before hitting the publish button.

This option is even more beneficial when you have audiences from varying countries. Say, you only want the post seen by a particular community. Then targeting posts is the solution.

Hit the right timing.

Study the best times to post so you can earn more views, shares and likes.

You want your posts, after all, reach as many people as possible. Note, however, that just because that certain day and time is apparently when the most activities happen on Facebook, does not mean that same schedule will work for you.

Conduct experiments by monitoring your posts and comparing feedback from the audience. This process, by the way, requires committed and passionate community managers.

Organize and pin posts.

I thought of using this Facebook feature too many times, particularly when looking for friends who can possibly help me with the research as I write my papers.

Before, (well, if you're like me) we tend to repost repost an announcement over again so it does not get buried deep on our timeline.

Nowadays, you can easily prioritize a post and make sure it stays on top of your timeline simply by clicking ‘pin on top.’ Yes, all it takes is one option from the dropdown box.

You need not worry about an ongoing contest you organized from being thrown into oblivion as you regularly update your page. You can make sure that your followers see this first on your Facebook by pinning it.

Optimise your account.

Your Facebook account could also use search engine optimization.

Your main website, for one, isn’t the only page, linked to your organization that show up in search engines. Even your Facebook account do, too.

Add keywords to your posts, and to their links before publishing. Share links to your page through the About Me or Website tab. Think of as many pages on your site that you can share, from contacts to products tabs. It also helps that you add keywords on captions of photos you post.

And since we have mentioned about hosting promotions or contests earlier, see to it that you indicate your main page as landing page when creating announcements. This is to ensure that your followers still find valuable information even after the campaign has already ended.

About the Author:
Nettie Gray isn’t the one to regularly post on Facebook about her personal life. She enjoys experimenting with it for marketing purposes.
Posted by Ravi Kolhe | 9/30/2013 | Continue Reading...

Learn How to Extract BKF File in Windows 7

This article thoroughly explains the reasons why a user cannot restore BKF file on Windows 7. Also, a section illustrates a simplified solution to users for how to extract BKF file in Windows 7 with no compatibility issues. Body: The improvement made in computers in last two decades has been commendable and now the situation is it is an in-evitable part of our lives. From corporate sectors to schools to home, computers have gained importance and so does the data saved in it. Actually, making a correction here, what makes computers worthy is the data stored in it. No matter if it is in the form of documents, music files, images, mail client files; data is considered as an asset and thus in order to protect the data, users try all possible means.

From the various ways that have been adopted to safeguard data against any kind of loss, “Backup” is one of the powerful disaster recovery scheme followed. In Windows OS editions NT series (2000, 2003 and XP), users were facilitated with a built-in tool called NTBackup Utility that enables them to create backup of crucial file (s) and folder (s). The entire backup gets saved in a file that is saved with .bkf extension.

While in the later versions of Windows (Vista, Win7 and Win8), the NTBackup utility was replaced by “Windows Backup and Restore” where instead of BKF file, a system image gets created (However, in Windows Vista, users have the opportunity to download NTBackup tool to create backup).

For now, here the matter of discussion is how to extract BKF file in Windows 7/8? This is one of the globally inquired query of users. First of all, the reason why a user cannot restore a BKF file on Windows 7 or 8 is the incompatibility in the type of backup created.

For example, as mentioned above the mode for backup creation in Windows NT series was NTBackup utility where BKF file was created while in other editions the medium of backup creation changed to Windows Backup and Restore where a Virtual Hard Drive file is used to create system image of the data.

Since the structure of backup files on Windows NT and WiN7/8 editions was different, there were compatibility issues owning to which a user was restricted to restore a BKF file on Windows 7 and thus the answer for query how to extract BKF file in Windows 7 was in-demand.

There were many situations where a user needed to extract the BKF file data on Win7. For an instance: Although backups are preferred to be external storage medias, most of the users backup their data on hard drive of the system. In situations when they have to move from Windows XP to the newly launched Win7/8 editions, they faced the backup restoration problem.

However, there is a brand name online that came up with resolution of this problem. BKF Recovery software that is a creation by a renowned vendor in data recovery domain emerged out as a help in this concern. This tool helps to restore BKF file on Windows 7. All that the users had to do is install this tool on their Win7 system and then import BKF file to extract its content. For completing the process Windows Backup Recovery Tool, users can avail the demo version of this solution.

About the Author:
The software firm is known for its quality solutions and Backup Recovery software is one amongst them. The tool has gained user acceptance for resolving one of the widely asked query as how to extract BKF file in Windows 7.
Posted by Ravi Kolhe | 9/09/2013 | Continue Reading...

How to Monitor Your Home or Office Computer

Why would you want to monitor a computer that you own? A variety of reasons. If it's a home computer you may want to keep an eye on troublesome kids of yours, that have taken to drinking and smoking in their teenage years. Or you may have a husband or wife that you suspect of cheating on you. If it's a work computer, you may have an employee that you suspect is spending every second your back is turned on Facebook and Youtube. Whatever the reason for wanting to monitor a computer, the software available today makes it an easy task to undertake.

There are hundreds of computer monitoring applications known as computer monitoring software available on the internet for direct download. Most of which have a free trial, so that you can see if that particular software is right for your needs before you buy it. Most of the applications available have a similar feature set, although you will find slight variations between each brand. Computer monitoring software almost always works in stealth, which means that anyone using the computer will have no idea that they are being monitored. That being said, if it's an office environment you might be obliged by law to let your employees know the company is monitoring the computers.

The monitoring software will give you an extremely accurate reports of what's been going on on the target machine. It will log any applications used, anything typed, any website visited, any document or file activity and anything printed. You will be able to see emails sent and passwords entered, and the websites they were typed into. All of this will also be logged with times, dates and screen shots, so that you can really see exactly what's been going on.

Another feature commonly found in computer monitoring software is the ability to send the reports to you remotely, via email. Once you enter your credentials, you can set how often you'd like the emails to be sent to you (every 2 hours for example), so that if you're at work you can see what's been going on at home that very day. Handy!

The above features are the average ones you'll find in the majority of computer monitoring applications. Of course, some will have more, and some will have less. A few have the ability to monitor things like the web cam or microphone. Others have online reporting, so you simply have to log in to your account on their website to view the reports. As with most software, each developer will have something their software is particularly good at, and something it's not.

If you'd like to read some reviews of some of the latest computer monitoring software head over to http://www.keyloggerdownloads.com where Gecko Monitor is currently rated number one.
Posted by Ravi Kolhe | 9/03/2013 | Continue Reading...

How to Import Lotus Notes Into Outlook 2010 Fluently??

Migrating data from established email client to a new one became a market trend that further explores ever-changing demands of users. Lotus Notes and Outlook are two famous email clients those are considerable by users for emailing and other collaborative tasks. Lotus Notes is compatible to adopt when you are tech and you do not have any problem to execute each command within email platform. In comparison to Lotus Notes, MS Outlook is adoptable when you are not comfortable to attend tech email operations. Businesses those are engaged to run operations at big extent or for normal purposes want to avoid hurdles within email collaborations. The outlook is quite easy to go with so, most of users and firms want to migrate data from Lotus Notes to Outlook.

Well Known Reasons for NSF PST Conversion

export_notes
How to import Lotus Notes into Outlook 2010 may be your quest when you do not aware about professional help for NSF PST migration. Before suggesting a non-failing commercial app for NSF PST data shift, underneath mentioned compelling reasons to export Lotus Notes to Outlook:

● Lotus Notes consumes high investment for installation and maintenance

● Steps for using Lotus Notes are not easy and clear

● Prior training is necessary before getting started to use Lotus Notes platform

● May be you are going to use Outlook in new organization

● Using both of these email platforms consecutively

Many more reasons over there to bother you for adopting MS Outlook over Lotus Notes but, all reasons cannot explore here. Before executing data conversion from NSF to PST, users need to have a proper plan because, having an idea regarding what you are going to do makes you more confident.

Preventions to Implement Before Doing Data Conversion

● Database Backup: During Lotus Notes to Outlook migration, due to some mistakes you can face data corruption issue so better to keep away from such obstacles by creating a backup of mailboxes.

Get an Apt Tool for NSF to PST Conversion

If you are using professional help for NSF to PST migration then, you will not face any concern like how to import Lotus Notes into Outlook 2010. SysTools Export Notes is one of the brilliant creations designed for shifting NSF data into PST without losing original properties.

About the Author:
Production of software applications for resolution of wide range of issues is prior concern of Joseph Hogg. For eliminating concern like how to import Lotus Notes into Outlook tool with name Export Notes is designed.
Posted by Ravi Kolhe | 9/03/2013 | Continue Reading...

How to Restore EDB Files from Failed Server?

Problem Scenario (as faced)

If it happens to be that your Exchange CAS box is crashed, either accidentally or by mistake, there is absolutely no way of getting it back. You might try creating an Exchange server with the same IP address and same server naming convention, but it simply will not work in any case due to the existing failed exchange server information Exchange Active directory and utilized domain configuration as well as Schema partitions of the .DIT DB file. The only viable option that you are left with in that scenario is to use the fallowing switch for performing the Exchange Server installation, in case it is a mailbox server.

EDB_files
Recover with /M:RecoverServer Switch - Steps to Be Undertaken:

1. First and foremost, you must install the fresh Server

2. Then, you need to provide the same IP as well as the same computer name which was there previously before the Exchange server failed.

3. Join the domain and also you need to ensure that your account has been added into the Local administrator and also that you have proper rights for Exchange administrator.

4. Now, the nest step is to reset the computer account in AD

5. From there onwards, you must make sure that your Server is identical with the failed server by keeping the drive letters same etc

6. Now, you need to copy the binaries of the Exchange installation onto this server

7. Eventually, drill to that directory

8. Finally, use the fallowing switch

Better Way of Dealing with It - By Using Exchange Recovery software

How to restore EDB files from failed server? Finding answer to this question also lands you in the rein of yet another cool-tool, the Repair Exchange Mailbox software, provided by an industry leading software vendor, SysTools. Use it to restore EDB files easily, swiftly, timely, accurately and smartly, whereby maintaining complete data integrity and ascertaining end-to-end recovery.

About the Author:
This esteemed organization has been serving users with a wide range of technically sound yet operationally user friendly software programs like Exchange Recovery application which has been helping worldwide users to Repair Exchange Server data before converting it to PST or transferring it to another Server.
Posted by Ravi Kolhe | 7/10/2013 | Continue Reading...

How You Can Keep Your Business Up to Date In 4 Easy Steps

Running a business in today's fast paced world can be exhausting. There are so many things that you have to keep up with, it can be hard to maintain your company's cutting edge lead over its competitors. If you want to be able to keep your business up to date, here are four easy steps you can take.

Know Your Industry

Keep Your Business Up to Date
While many companies keep up to date on what their target audience is doing, a company must also know everything they can about the industry they work in. This industry news and information can let you know what your competitors are up to, what innovations are being discussed and the future of the industry in general. It does matter if your company is the the oil industry or the toy industry, it is essential to learn what you can from trade magazines, conferences and other industry events.

Keep Up with Big Data

Most businesses collect massive amounts of data. This data can range from demographics on target audiences to personal information on current customers. With a range of business intelligence methodologies, a company can easily keep up with interpreting the data for unique insights in to how the business can be improved. From benchmarking to website analytics, this useful information must be interpreting at a quick pace in order to be relevant for decision-making processes.

Audit Your Equipment

In a technological world, some computer hardware and software is obsolete right after it is released. In order for employees to have functioning equipment and for customers to take notice of your business as a leader, the most up to date equipment should be used at your offices and at home with telecommuting employees. A yearly audit of all the equipment at your company will determine what you can still use and what will need to be replaced with a more recent version.

Maintain Your Online Presence

No business today can reach a wide audience without an online presence. For most businesses this is a website, but it can also come in the form of social media accounts. No matter what your business chooses, it is important to keep your social media account or website up to date with the latest information on the company. You can also watch social trends online so that you can participate in the ones that are clearly relevant to your business. If your audience is young, social media is a must.
Posted by Ravi Kolhe | 6/28/2013 | Continue Reading...

How to Bring Modern Technology into the Classroom

The rise of modern technology has confused students and parents alike. Parents want their children to achieve and not get distracted by the latest video game. Kids want to use their smartphones in the classroom to enhance their learning.

Schools call such advocates crazy. Mobile devices are the biggest distractions going. Just look at the average American playground. Instead of playing sports, kids are sitting in circles playing games of Angry Birds and increasing the childhood obesity figures.

Bringing modern technology into schools is difficult as it doesn’t differentiate between work and pleasure. Plus it takes a lot of investment and training for teachers. The need to modernize across multiple areas is why schools are slow on the uptake.

In light of these common concerns, here are a few types of technology which could work in the classroom and why schools should consider using them right now.

Projectors

We all remember those bulky school projectors which barely ever worked. The thin plastic sheets with things written on them was about as advanced as it got. Now they’re about as small as a mobile phone and can project videos and images in full color. More advanced projectors even have surround sound capabilities.

Projectors work well with PowerPoint presentations. Teachers can connect it to a laptop or computer and control what appears on the screen from there.

Newer digital projects are popular and therefore don’t cost as much as you think. When schools need to replace projectors, it’s wise to spend a little extra on more durable, hi-tech digital projectors.

TV and DVD Player

The TV and DVD player is an essential part of education. Since the old cassette video is long gone, you don’t have an option but to purchase a DVD player. TVs and DVDs are so common they barely cost anything. It’s better to have a higher quality video because this engages with students better.

Cloud Computing

Transitioning to cloud computing would take files away from the school system and place them on an online server controlled by the school. Most students can access the Internet from home. This would enable them to download homework and any other school work without being at school. It promotes more flexible learning.

It’s also simple to use. The only difference is you’re saving work to the cloud instead of on the physical school system.

The cloud also protects files against computer crashes.

E-Readers

Textbooks still reign supreme in the classroom. E-readers haven’t managed to convince authorities of their usefulness. It’s understandable because they could easily serve as a distraction device.

Schools which monitor them properly could streamline learning. Textbooks are expensive. eBooks are not. It also removes the need for children to carry around bulky textbooks and risk spilling their juice boxes over them. Again, it also allows studying from anywhere because the textbooks don’t remain in school.

Staying with the same type of technology, you could introduce electronic note takers. Instead of writing on paper, they write using a stylus and a tablet. Save the notes onto the tablet and edit them at will. It’s much easier to make virtual changes than those on pen and paper.

Personal Headphones

Headphones are dangerous as teachers find it impossible to tell what a student might be listening to. Whilst we’d like to think it’s an audio learning course, usually it’s Justin Bieber ruining the music taste of yet another young person. If rules are properly enforced, they can provide a boon to the quality of education.

Language learning courses can benefit the most from the use of headphones. An example of use in language learning would be a voice asking the student to say a phrase. Other pupils would have to translate what the student said. This enhances speaking and listening skills.

Another good example is to get students used to certain accents. Latino children who speak mainly Spanish could listen to alternate accents in English class. It could be a British, Australian, or American accent.

Most teachers simply can’t implement this level of learning in the classroom without outside help.

Personal headphones are cheap and nearly always figure in music classes anyway. Even the audio tapes are cheap, and schools often get special discounts.

About the Author: Korah Morrison, working for College-Paper.org – the best student’s helper.
Posted by Ravi Kolhe | 6/27/2013 | Continue Reading...

How to Create a GUI Component for Java in Just 7 Steps

It becomes a turbulent issue for web site managers when they come across some issues in their Java website. Unlike PHP, it is a secured language, which provides an arranged procedure of coding. However, the customization is not an easy task, when it comes to Java. But, if you are trying to create a GUI component for your Java website then this tutorial can help you.

Technically, you will have the need of Java swing library, which is based on Java Abstract Widget Tool Kit. For your information, ‘AWT’ is an old platform. This platform is dependent on GUI toolkit. So, there is a freedom to use the components of GUI library like Button, textbook, etc, which sets you free from creation of components from zero.

Here is a video, which can be followed for creating the swing component:


Create a GUI Component for Java in Just 7 Steps
On looking at the above-mentioned graph, you might be coming across the question that what is container class. Noticeably, the components in swing are JComponent and can be added in container classes. Therefore, you should know the container classes at first.

Container classes

Technically, you need a class with competency of carrying other components and container classes are that classes. You can also take the reference from its name. So, you need to have a container class for making a GUI. There are three kinds of class: Panel, Frame, and Dialog. The panel is basically a container, which stands for organizing components on a window. The frame class is window, which contains components and possesses independent title & icons. Well, you will remember dialog class as a pop up window, which will beget a pop up on requirement of display. However, this class is not like Frame class in case of functionalities.

Here is an example that you need to see in order to learn how to design GUI in Java.

Step 1: Copy Below Mentioned Code Into An Editor

import javax.swing.*;

class gui{

public static void main(String args[]){

JFrame frame = new JFrame("My First GUI");

frame.setDefaultCloseOperation(JFrame.EXIT_ON_CLOSE);

frame.setSize(300,300);

JButton button = new JButton("Press");

frame.getContentPane().add(button); // Adds Button to content pane of frame frame.setVisible(true);

}

}

Step: 2 Now, you need to save this code snippets, compile, and run the code.

Step: 3 In this step, you need to add a button in your frame by copying further mentioned code into an editor.

import javax.swing.*;

class gui{

public static void main(String args[]){

JFrame frame = new JFrame("My First GUI");

frame.setDefaultCloseOperation(JFrame.EXIT_ON_CLOSE);

frame.setSize(300,300);

JButton button1 = new JButton("Press");

frame.getContentPane().add(button1);

frame.setVisible(true);

}

}


Step 4: Now, you need to execute the code, which will bring this button.

Create a GUI Component for Java in Just 7 Steps

Step 5: In this step, you can try to add two buttons. You just need to copy and paste the below given code in an editor.

import javax.swing.*;

class gui{

public static void main(String args[]){

JFrame frame = new JFrame("My First GUI");

frame.setDefaultCloseOperation(JFrame.EXIT_ON_CLOSE);

frame.setSize(300,300);

JButton button1 = new JButton("Button 1");

JButton button2 = new JButton("Button 2");

frame.getContentPane().add(button1);

frame.getContentPane().add(button2);

frame.setVisible(true);

}

}


Step 6: Congratulations, now you just need to save, compile, and run this program.

By following this process of GUI component creation, you will be able to create a spectacular component. In case, this process is not easy to execute for you then you should take Java web development services from a renowned company. It will help you in enhancing the competency of your website. And, offshore Java application development will not be much costly for you. So, just find skilled developers and create your GUI component.

About the Author:
Mia Johnson is a senior coder turned web consultant, who advises newbie business organizations to Hire Java Developers at cost-effective prices for Java web development.
Posted by Ravi Kolhe | 6/26/2013 | Continue Reading...

How to Recover Files From a Non-Booting Mac

One common issue that we help customers with everyday is recovering files from their Mac hard drive when it fails to boot into the operating system. If you have any files on your Mac hard drive that are not backed up then this can be devastating, but that's where Mac recovery software can help you recover your files to another drive.

Since the operating system on your Mac hard drive is no longer available, you will need another method of booting your computer so that Data Rescue 3 Mac recovery software can access the hard drive.

Methods for using Data Rescue 3 with your Non-Booting Mac:

A. Secondary Startup Drive: Install a version of OS X to an external drive. You can use this drive to boot your computer. Then install Data Rescue 3 (try the free demo) to this drive to begin running a scan.

http://www.prosofteng.com/products/data_rescue_choose_os.php

B. Target Disk Mode: If you have a secondary Mac available to you that is working, you can use this method to connect the two Macs. You can install Data Rescue 3 onto your working Mac and your non-booting Mac will show up as an external drive.

http://www.prosofteng.com/products/data_rescue_target_disk_mode.php

C. Data Rescue 3 Boot DVD (Older Mac's only): If you have an Early-2011 or older model Mac, you can use the Data Rescue 3 Boot DVD to start your Mac. The current DVD will not support any Macs released after June 2011.

http://www.prosofteng.com/products/data_rescue_boot_dvd.php

Next Step, Scanning or Cloning your Mac Hard Drive

How to Recover Files From a Non-Booting Mac
Once you have Data Rescue 3 running using one of the boot methods above, you will need to scan your Mac hard drive to recover your files to another drive. When you start a new scan in Data Rescue 3, select your Mac hard drive as the source in step one, and then choose one of the following tasks:

1. Quick Scan - If the volume on your drive is still detected by Data Rescue 3, this is the first scan you will want to try and it will detect existing directory structures on your drive. You should only select a single volume for a Quick Scan. This scan usually takes only a few minutes to complete and will result with a Found Files folder containing your original folder hierarchy and file names.

*If the Quick Scan takes longer than an hour or is unable to find any files, try the Deep Scan.

2. Deep Scan - This will scan the entire drive for files. The first part of the scan will detect the existing directory structures on the drive like the Quick Scan but can work with multiple volumes. This will result in a Found Files folder like from the Quick Scan.

The next portion of the scan will search the entire drive, block by block, for files based on file patterns. This will provide the Reconstructed Files folder, which will not have the original directory structure or file names. The files will have generic file names and will be organized by categories and file types.

3. Clone - In more severe cases you will want to clone your Mac hard drive. Like if you suspect potential hardware problems with the drive, if you notice any drive failure warnings while scanning, or if scanning the drive provides unrealistic estimates for the time required for the scan.

In order to clone you will need a secondary drive that is the same size or larger than your Mac hard drive and does not contain data (cloning will erase and write to the destination). Cloning will attempt to make an exact copy of your drive to a known good drive, so that you can scan the good drive instead of further damaging the original drive. Once the clone is completed, then you will want to run a Deep Scan on the clone drive using Data Rescue 3.

Recovering Files

When you have finished scanning your Mac hard drive or the clone, the last step is to select files and recover them to another drive. Once the recovery completes you will have your files on another drive. We would recommend going through the files on this drive to verify that your important files are there and that they open properly.

If you have any questions about this process at all, contact our FREE California based support team via email at: support@prosofteng.com or phone:  925-426-6306. Support is available Mon-Fri,  7am-5pm Pacific.
Posted by Ravi Kolhe | 6/01/2013 | Continue Reading...

How To Manage Stock In A Virtual Store

Selling goods online shares many principles with similar operations which have physical storefronts, such as the need to effectively convey the benefits of a product to all potential clients, and to make them look inviting, or, if this isn't possible or practicable, show that at least they will meet their requirements.
But there is much more to setting up and operating an effective online selling website than simply the 'build it and they will come' principle.

Effective monitoring essential

Once a store has been launched online, one of the most essential requirements is that an effective system is in place for monitoring stock levels and managing the process of purchasing further stock. This central operation is vital to how successful the enterprise will be in managing its cash flow as well as its physical stock levels. And in many cases in the past, this fundamental aspect of running a business has become its downfall, when a manager or owner either buys too much stock in the hope of being able to sell it, or does not buy enough, and is subsequently caught out by the level of demand, leaving lots of people to have to go away and find what they are looking for elsewhere.

Four vital principles govern the way in which any business should manage its inventory:

● Stock should not just be stored, but should be carefully organised
● A business should start out with only the amount of space it needs, expanding into larger premises as and when necessary
● If it is dealing with products which have a high turnover, it should consider outsourcing the function of managing and dispatching its stock, and
● If at all possible, keep the bare minimum inventory, and try to balance goods you order with those you sell. This is the 'just in time' principle which is one of the reasons why our supermarket chains have been able to grow so large, and operate such big stores effectively.

Human inventory checks

A small number of lucky companies can operate without having any physical stock at all – such as companies which sell digital downloads – and this means they are much more easily scaleable than others which have to consider where and how to store their stock.
But for many others which handle physical goods, their distribution function plays a vital part in their fortunes. So while a high level of computerisation and automation can be built into its warehousing and stock management functions, some human intervention is needed. So there will always be a strong demand for people with the requisite skills to handle stock management and logistics functions for a company if it is to grow successfully yet still be able to remain capable of maintaining the momentum of that success.
Whether dealing with the automated or manual parts of the stock management process, however, this is a vital consideration for any business, which has the power to make the difference between it becoming a big success, simply earning a living for its owners, or falling by the wayside, as so many do.

About the Author:
Christina Jones is a freelance web developer and technology writer who is always on the lookout for best ecommerce website examples on the web. Christina likes nothing more than a well-designed, user friendly site.
Posted by Ravi Kolhe | 5/14/2013 | Continue Reading...

Dial Up Connection – How does it work?

Dial up internet connection is becoming more and more rare due to the introduction of the broadband and wireless internet connections, however it is still commonly used by more people than you would expect.

Dial up internet connection is a connection which is used by connecting your telephone line to an outside ISP, also known as an Internet Service Provider which ultimately connects you to the internet. The parts of a dial-up connection include a modem; this transmits the signal from your computer to your phone line, connecting it to the modem located at your ISP, as well as a telephone line.

A dial up internet connection can connect to the internet by the user giving the signal from the computer. For example, you double click on the internet browser whether it is Firefox, Google Chrome or Internet Explorer. This will subsequently initiates the dial up process so that you can use the internet. The dial up process begins by dialling in; you will be able to hear the numbers being dialled alongside a series of clicks and beeping noises. This takes place to allow the connection to modulate to the ISP’s modem. When this process is complete, it has now gained an Internet Protocol or in other words an IP address from the ISP which enables your PC to connect to the Internet network.

Despite the dial up connection method of connecting to the internet known for being inexpensive, there are reasons for this. Dial up internet connection can run at an extremely slow pace, especially when streaming videos. This is because the phone line used in dial-up connections permits only a fairly limited stream of data from the ISP. For example, most dial-up connections allow about 56 kilobits per second while broadband permits as much as 512 kilobits per second, which makes a world of difference in terms of the speed of your Internet connection.

Dial up connection despite being over powered by the rival of broadband is still commonly used around the world as it works effectively like a pay as you go phone. It is a great option for low budgets however speeds can be very unreliable and slow. If you find that you do not need a 100% connection all of the time, then a wireless connection is something you should take a look at and consider.
Posted by Ravi Kolhe | 5/10/2013 | Continue Reading...